Upgrading MicroK8s
Upgrading a single-node Microk8s cluster is as simple as running the snap command.
sudo snap refresh microk8s --channel=1.24/stable
But we hardly run single-node clusters, leave alone updating them :) With multi-node clusters, that gets complicated. It is a 3-step process done for each node, serially. It starts with the master node.
NOTE Before any upgrade, it is imperative to take a backup of your cluster data, using a tool like Velero. More on that in a future post. There are a couple of other things you have to keep in mind regarding Kubernetes upgrades. You always upgrade from one minor version to another. Assuming you are currently running 1.22 and you want to upgrade to 1.25. Your upgrade path should be 1.22 -> 1.23, 1.23 -> 1.24 and finally 1.24-> 1.25. You have to read the respective Kubernetes version release Changelog and ensure that your deployments are compatible with the version of Kubernetes you want to upgrade to. There might be some features which might be deprecated in that version of Kubernetes. The upgrade process is not responsible to ensure backward compatibility of your deployments, you are!
- Drain off all the pods in the node.
microk8s kubectl drain <node-hostname> --ignore-daemonsets --delete-emptydir-data
The --delete-emptydir-data is important. It will allow Kubernetes to delete a pod inspite of the fact that it uses local storage to persist data. Obviously, the data persisted in such volumes will be lost during the migration process. Here’s an example of a pod which uses local storage.
apiVersion: v1
kind: Pod
metadata:
  name: shared-volume-pod
spec:
  containers:
  - image: busybox
    name: test-container
    volumeMounts:
    - mountPath: /data
      name: shared-volume
  volumes:
  - name: shared-volume
    emptyDir: {}
- Upgrade the Kubernetes version in that node using
snap.
snap refresh microk8s --channel <your-desired-version>
- Uncordon the node once the upgrade is successful.
microk8s kubectl uncordon <node-hostname>
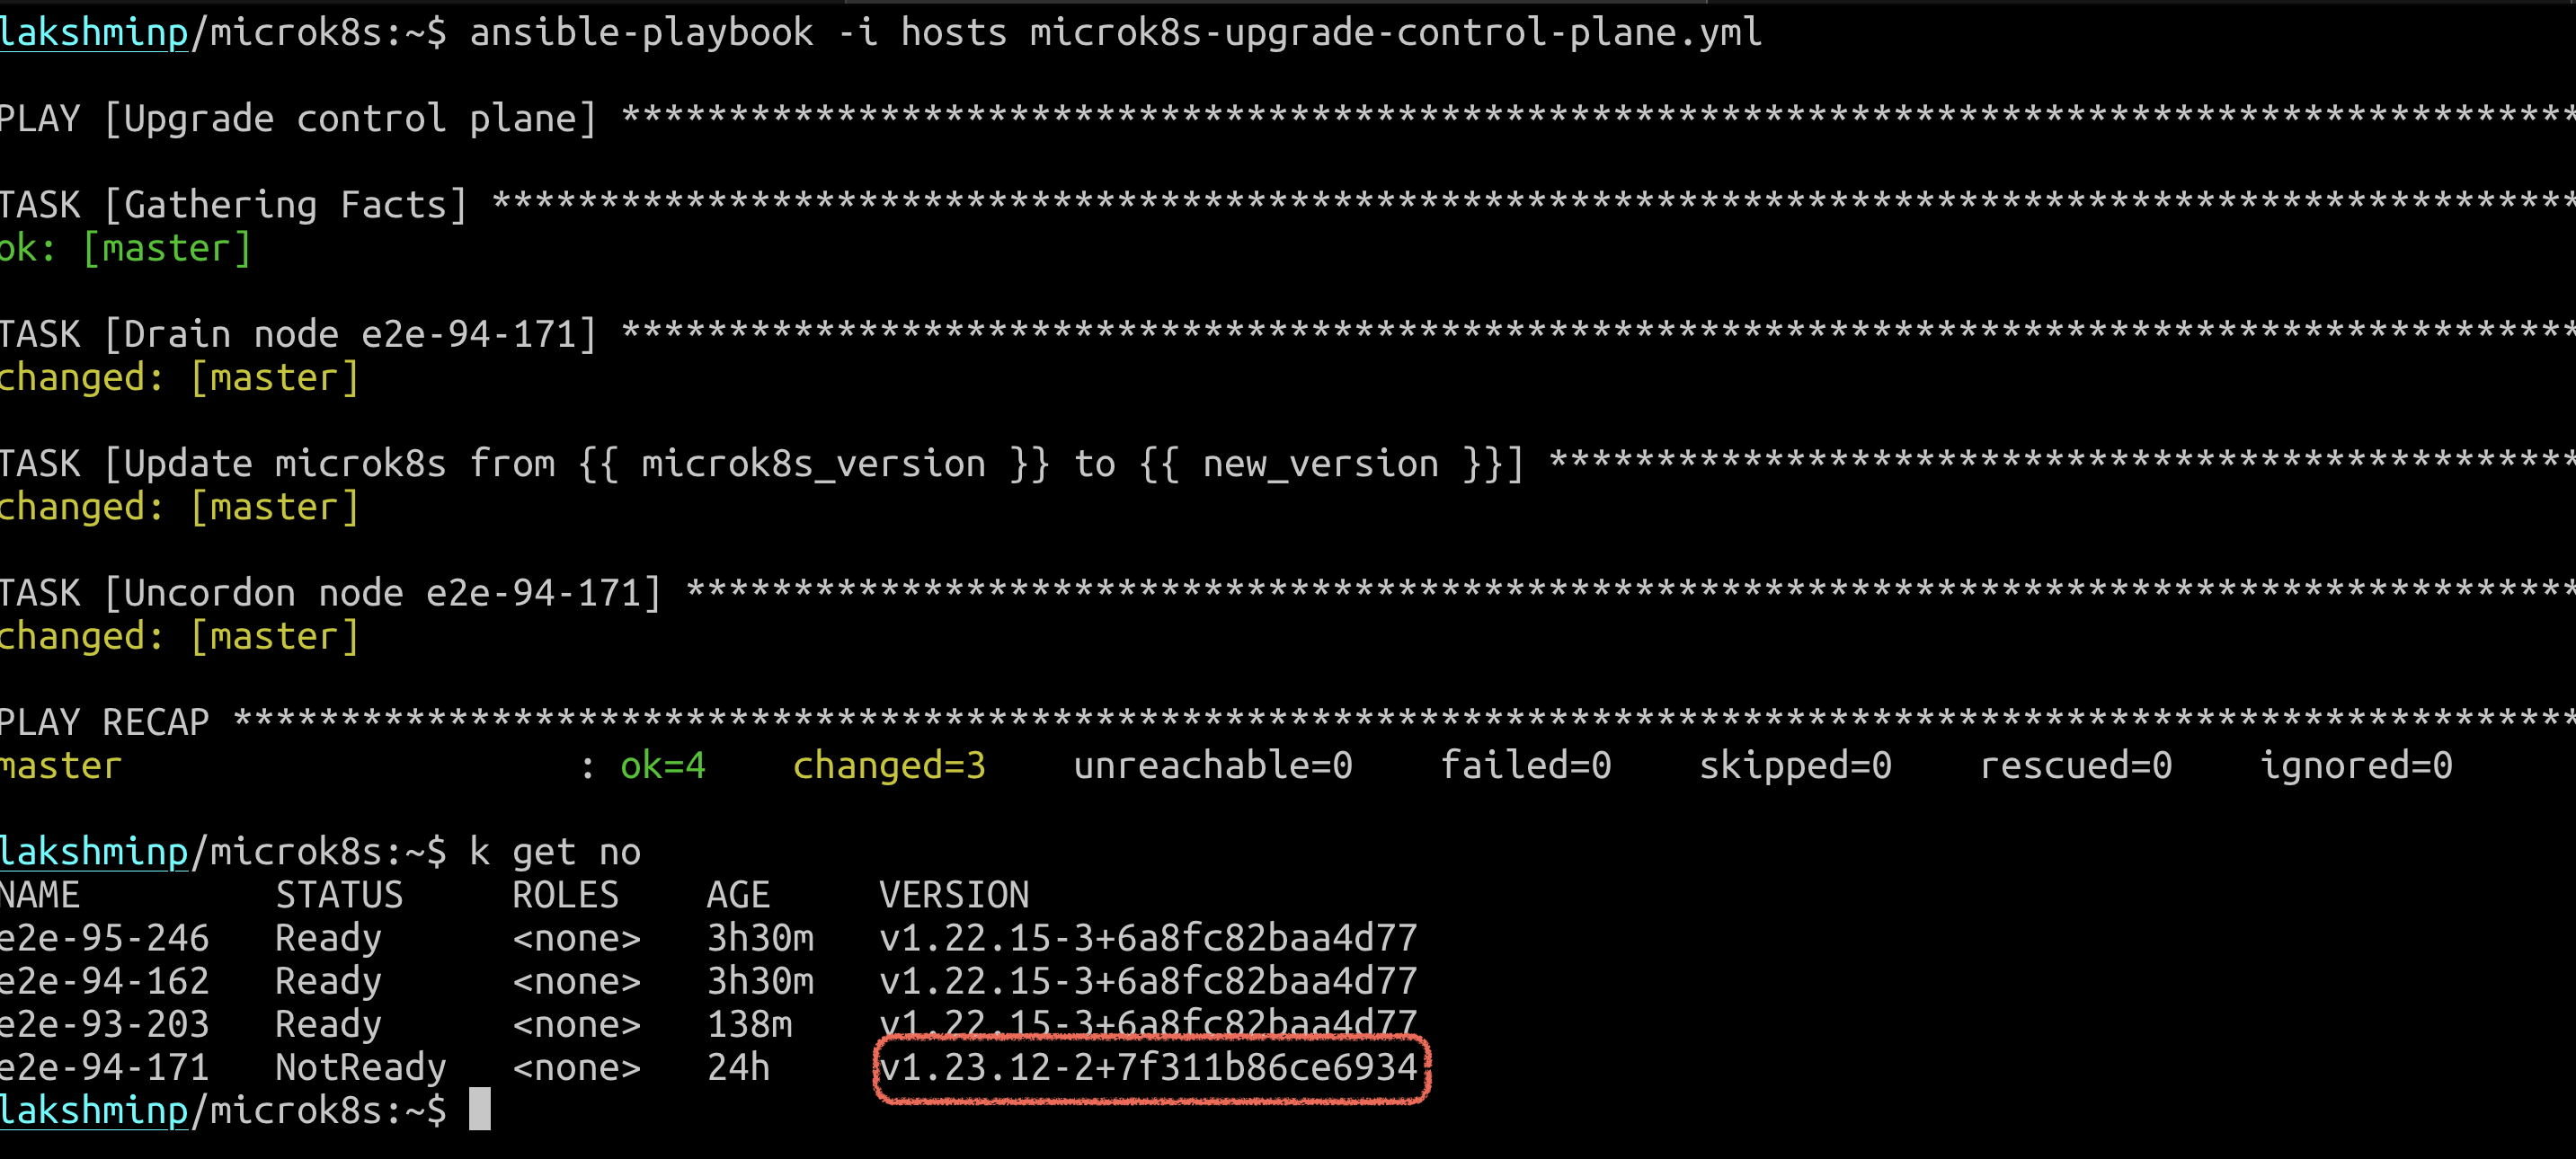
It is important to repeat this sequence for every node individually and not to parallelise this. Once your do this process for the control node, kubectl get nodes will yield an output like this:

You can notice how the master node is upgraded to a later version of Kubernetes but the worker nodes aren’t, yet.(BTW, the master node in the screenshot moved from NotRready to Ready in the next minute or so!)
Continue following this process for other nodes as well to upgrade your entire cluster. I’ve written an Ansible script called microk8s-upgrade.yml which does this exact thing. All you need to do is fill in your current version and desired version of Kubernetes and run the playbook.
---
- name: Globals
  hosts: all
  gather_facts: false
  tasks:
    - name: Set facts
      set_fact:
        old_version: "{{ microk8s_version }}"
        new_version: "{{ new_version }}"
- name: Upgrade Kubernetes
  hosts: microk8s_HA, microk8s_WORKERS
  serial: 1
  tasks:
    - name: Drain node {{ ansible_hostname }}
      shell: "microk8s kubectl drain {{ ansible_hostname }} --ignore-daemonsets --delete-emptydir-data"
    - name: "Update microk8s from {{ old_version }} to {{ new_version }}"
      become: yes
      shell: "snap refresh microk8s --channel {{ new_version }}"
    - name: Uncordon node {{ ansible_hostname }}
      shell: "microk8s kubectl uncordon {{ ansible_hostname }}"
You can run it in the same directory where you installed Microk8s.
ansible-playbook -i hosts microk8s-upgrade.yml
All my nodes are now upgraded.
Troubleshooting #
What if an upgrade fails? You can easily revert it to the previous state using the following command:
sudo snap revert microk8s
Caveat The Ansible playbook is not designed to handle these scenarios. It is more of a script designed to automate the grunt work of ssh-ing to 10+ nodes and running the 3 steps.
Other ways to upgrade #
What if you don’t want to do this style of in-situ upgrade? If you’re having more money(and possibly more time), depending on your workload, you can spin up a new cluster with the desired Kubernetes version, deploy your workloads there and shutdown the older cluster once things are ticking fine in the newer cluster. This is more of a blue-green style cluster upgrade and makes sense if you want to upgrade from a relatively old version of Kubernetes.
Upgrading addons #
There is no obligation to upgrade any Microk8s adding while upgrading the cluster. Unless the add-on has artefacts which are not compatible with the newer version of Kubernetes. Add-ons can be upgraded independently of the cluster usually. The official recommendation to upgrade an add-on is to disable it and enable it back again. There is a proposal about adding an update phase, much like an enable and disable phase, but at the time of writing this, it is just in the proposal stage. This is my main gripe about Microk8s. Most add-ons are, under the hood, simple Helm installations. Disabling them does a helm delete . This might not make sense in some cases, like OpenEBS. Hence, in my opinion, we are better of managing the add-ons ourselves rather than leaving it to Microk8s.
You can get access to the source code here. We shall discuss taking backups of your cluster data in the next post.